Quilting: definitely not my forte,.. a sign making tutorial
I've needed to make a sign for art shows for the longest time! People always come into my booth and I have to tell them that my products are all from second-hand fabric and handmade, and blah blah blah. It gets redundant. And the only thing with my name on it is my business cards. I had to step it up a notch and make this! I have the Yellow Jessamine Festival coming up this weekend, so I finally made one using scrap fabric.
You could also alter this project to make a wall hanging for your bedroom with funny sayings, or you could use pictures instead of writing! Make a hanging photo collage that looks so much better than just a photo in a frame!
I used the following materials:
- thrift stores picture frame
- spray paint
- scrap pieces of fabric
- photo transfer paper
- white linen napkin
- masking tape
- scissors
- iron
- ironing board
At Salvation Army I found an 11" x 16" picture frame that was a hideous was orange with a hideous gold sponge paint overlay. I spray painted it red. It took a few coats.
On with the sewing! All you quilters will find this project super easy. Oddly enough, I can make awesome handbags, alter clothes, make clothes from scratch and sew as like the day is long, but I can not quilt! I hate measuring things exactly; I hate cutting on grids and measuring. This project tested my patience a little bit for these very reasons.
I always save little scrap pieces of fabric, which came in handy for this project. I found an wide variety of pieces big and small. Sat them aside. [Hint: I organize my scraps in plastic zipper pouches pillowcases come in. They work great for organizing fabric you have laying around messing up your sewing area. They stack perfectly, and being clear you can see most of what they contain!]
Next you will need to print out what you want your sign to say, or your photos. Open any photo editing program. Type or create what you want on your sign. Don't forget to flip horizontally before you print, even if you are using photos! This is what mine looked like:


Cut out the words, if the background is white you can cut right up to the letters. Or cut to the border of the picture.

Position them on the fabric and iron the transfer using the manufacturer's instructions. Wait till it's completely cool to peel off the paper!

Cut them out.

Sew scrap pieces on either side of your writing that are as the same height. This of course depends on what you want your sign to look like, this is just how I did mine. You can do this any way.

I attached strips in between these pieces, and mounted the complete piece of fabric on an 11" x 16" piece of cardboard, using masking tape. Put back in the frame and you are done!
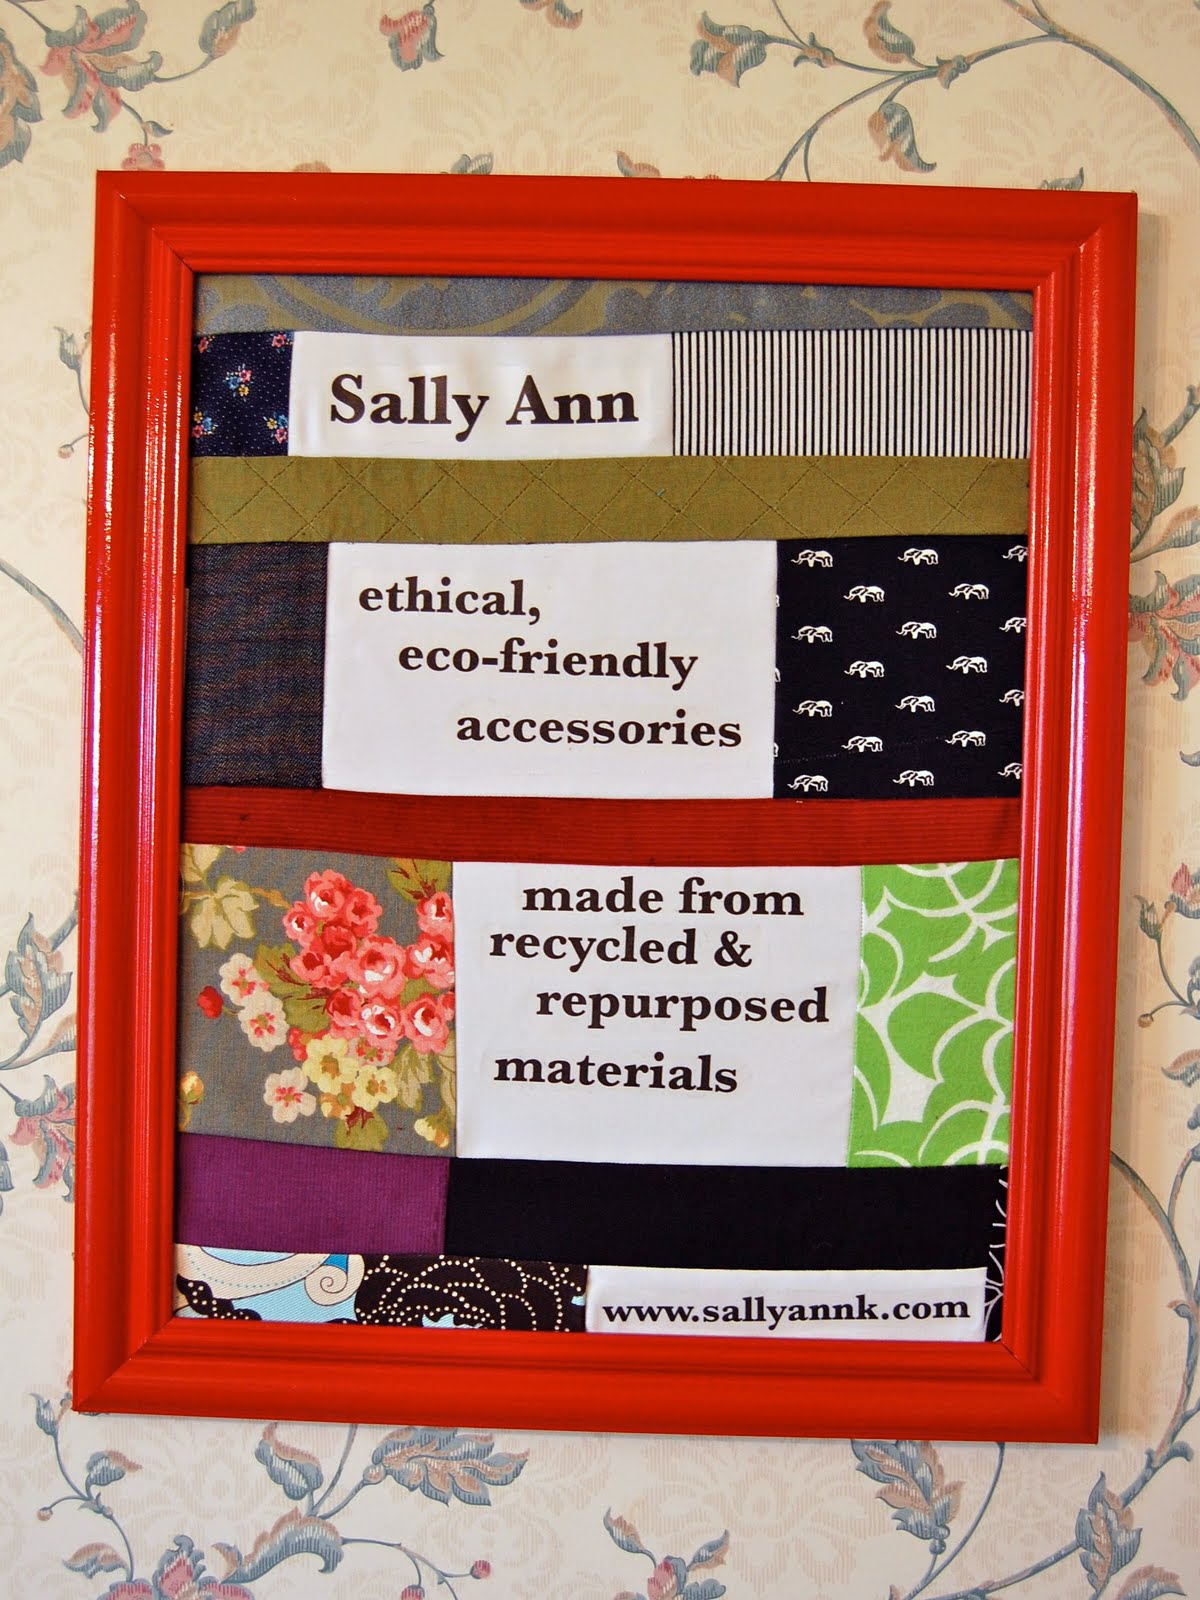
This is your end result!
And viola! You have a beautiful sign to advertise what you make!
It's really quite a simple project. But for beginners, refer to these sites for help with quilting and sewing:
- Quilting How-To
- Quilting 101
- Threadbanger - a great DIY site! Full of fun projects, an awesome podcasts!
- SewingCrafts.com - full of awesome tutorials submitted by great patternmakers.

Also! I finally have my thread cabinet on the wall in my sewing room! So exciting! My dad and Sue bought it for me for Christmas. I'd wanted one for years. Jo-Anns only carries them for their day-after-Thanksgiving sale; they are doorbusters. I try to only use Guterman thread so it's perfect for me.
[Notice the tension rod on my shelving unit with the sheer curtain. A great way to hide all your fabric! Even though everything behind it is color-coordinated, it tends to look messy all the time, and when company comes over it makes the room appear much neater. Especially since my workspace is the dining room.]


Holy crap! That seems a lot harder than it looks when you put it that way. ;] You did an excellent job! I also love your thread cabinet.. looks pretty.
ReplyDeletexoxo
I ♥ it! tacking this on to my list of on-going projects...
ReplyDelete