DIY Skinny Jeans -
Turn a wide leg pant to skinny or straight leg
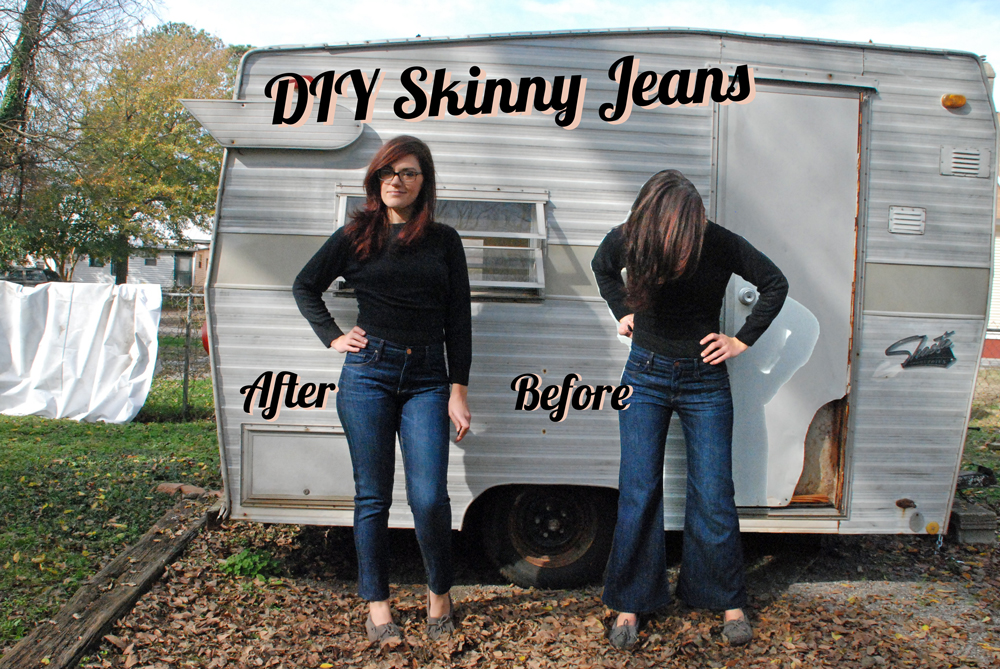
Have you ever found the perfect pair of jeans, on the top half, and absolutely hated the bottom half and cut of the legs. This tutorial is for you! Since I only buy second hand clothes, I have a hard time finding exactly what I'm looking for, and can never find that perfect pair of jeans. This pair, from the Gap, I purchased at a local used clothing store. They fit like a dream in the hips and waist, but someone had shortened them, and they were bell bottoms. Eek. Not my style.

Before, above. And also before my morning coffee and sans makeup. Don't mind my disheveled appearance. By the way, this tutorial is for an intermediate level seamstress.

For this tutorial, you will need:
- a heavy duty sewing needle and sewing machine
- bright denim thread, found at any store that sells thread (above)
- dark thread to match your denim
- chalk
- razor blade and/or seam ripper
- a ruler
- scissors

1. Mark the size of the desired legs. I just eyeballed it because I've done this before, but it may be best to use a pair of skinny jeans you already own. 2. Open both sides of the pant leg up to where they fit the snuggest. I went up to mid thigh. Use a razor blade for this, as there is a lot of thread to rip out. A seam ripper takes for-e-v-e-r. 3 & 4. Start with the leg that has the top stitching. On this pair, it was the inseam. Take in pants. Leave the BACK side of the jeans a little wider than the front side. To do this, I matched up the bottom of the seam a little staggered, with about 1/2 inch difference. 5. Try on pants and see how the new seam lays. Thread your machine with jeans contrast thread. 6. Trim excess fabric. 7. Top stitch, replicating the original look of the jeans. 8. Sew the other side of the pant leg. And that's it! Done!

Having a top stitch with this thread makes for a more professional look, no one will be able to tell you altered your jeans!

Because I have lost a few pounds since I bought these jeans, I added little darts in the back of the waistband, a little shortcut from the proper way of tailoring them, but this works just as good. In two spots, equidistant from the center back, sew darts the same width. Be sure to go over the darts a few times to prevent the thread from giving.

So much better! Nothing is as great as the perfect pair of jeans. Am I right?! (sidenote: I can't wait to fix that stupid rotten door on Shelby...)

Zeus was so excited about my new jeans he went and jumped in the leaf pile! I can hear the yard guy raking the pile back up as I type this sentence. Hahaha oops. Bad dog.

Zeus' new thing is to take his ball and drop it in the leaves, then search for it. When he finds it, he gets sooo excited. Then I throw it, he retrieves, and back to the leaf pile to loose it again.

Hahaha, this photo! He looks like I'm about to squeeze his eyes out. He wasn't wanting to pose for pictures with me this morning. He had his eyes on that leaf pile!

I hope you all have found this tutorial helpful or even motivated to grab an ill-fitting pair of jeans and head to your sewing machine! Questions/comments, feel free to email me with any sewing questions or advice at sallyannfashion@gmail.com. Happy Wednesday!
For another jeans tutorial, making "curvy jeans" click here.
For a tutorial on how to patch jeans, click here.
For another jeans tutorial, making "curvy jeans" click here.
For a tutorial on how to patch jeans, click here.


So great! I have a few pairs of jeans that are wide leg but still fit around the waist, so this would be perfect! I just need a free afternoon to get to work!
ReplyDeleteI need to seriously try this ASAP! And those jeans look incredible on you!!
ReplyDeleteI really need to take some sewing lessons, haha.
Thanks for sharing! :)
Ack. I need to do this. So many jeans that don't fit!!
ReplyDelete