And the rebuild begins...

There are no straight instructions on how to renovate a vintage camper. Sure, there are forums, and basic carpentry, and problem solving. Our '73 Shasta Compact was full of water damage, as such, the front and back walls need to be completely replaced. The problem: when these campers were built, the interior frame was built first, and then the aluminum wrapped around it last. Well we can't move the aluminum, and have to go about the renovation completely backwards, and without any real instruction. We're kinda figuring it out along the way. Sunday's start of the rebuild was an absolute disaster!


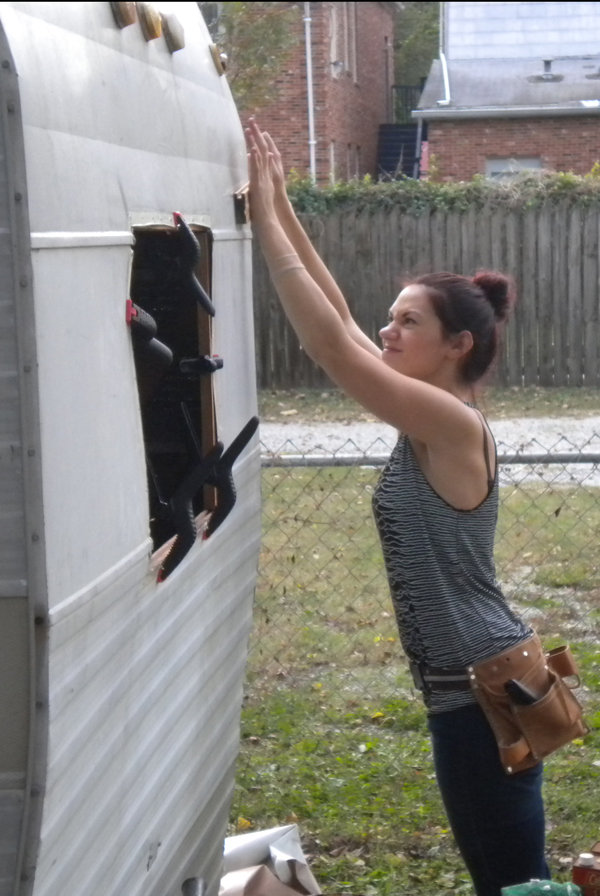
Because all the old caulk and water damage around the windows, I had the bright idea of removing the window, rebuilding the wood framework along the wall, and then replacing the window, reattaching it to the wood frame. And by me having a bright idea, I mean, I bullied Matt by insisting that was what we do. I'll admit, I am too bossy, I don't listen, and I think I know everything in the moment of working on something. Poor Matt. Well the wood the window was originally attached to, sandwiching the aluminum in between the window and wood, was rotten, and the screws were only through the aluminum.

"Please don't be mad at me, Matt. I'm sorry I'm such a brat and don't listen." Matt used to work construction years ago, and he told me many times throughout the day that I'd be fired for my behavior and disregard for some safety issues. I almost hammered his thumb once or twice and stood too close while he used a saw. But at the end of the day he forgave my stubborn nature. One day at a time.

So to rebuild the interior wall, the wood supports are 1" deep and 3" wide, the camper roundly 6' wide. Well one can't screw into a 1" deep board, it splits. We found this out the hard way, a few times. So what to do? Well the previous supports were stapled together with a 2" wide staple that one can't replicate outside of the factory. So how to we rebuild these supports? We tried small triangular trusses, to screw into each support, attaching them using the truss, but the wood split because it's not wide enough. Back to Lowe's we went....


The man working at Lowe's suggested we use these small metals plates, they are hammered into each piece of wood and are generally used in deck construction when a nail or screw can't be used. Another problem, the wood we used is old hard wood pine, and really hard. It took so much force to get those metal plates attached.

We assembled an "H" like support identical to the original one, and used liquid nail and clamps to put it back on the wall, attaching it to the side supports. Another issue, our measurements were off. We didn't measure the original boards, since during demo they were so rotten it didn't even cross our minds. Once the supports and window were removed, the aluminum sides flexed and bowed out, making any measurements slightly off and inaccurate. Just when we thought it couldn't get worse. And this is a few hours into working on this wall. It was just issue after issue.

At least someone enjoyed their day. Zeus loved just sitting in the yard, rolling around in the dirt, and chewing on wood.
The worst part about these plates, that seemed to be the answer to all our problems, was that they didn't really stay attached while moving the wood into the trailer. Matt had to bang them back together with the hammer from the interior, and I had to hold a piece of wood on the outside shell to prevent further damage. The board beared the brunt of the force of the hammer, absorbing shock as to not damage the shell. Without the wood supports on the inside, the aluminum shell is very flimpsy and delicate. The force of the hammer was way too much for the camper to bear.

So we got the whole interior frame in place, and it was too narrow for the window. I could have burnt down the stupid camper, I was so mad. We had to remove the whole thing, move the board about 1/4" to the outside of the window opening, and attempt to place the window again.

Lesson learned: do not remove these windows! The back wall, we will remove the screws, rebuild the wall supports, using metal plates that are screwed in, NOT hammered, and they replace the screws, allowing the window to sit in it's original place, never being lifted out.

Finally we were able to reinsert the window and screw it back into the supports. I would be so happy to never have to deal with this wall every again! I cross my fingers that the back wall will be MUCH MUCH easier to replace.
Next weekend should be interesting...


That Unknown Pleasures tank is amazing. Where did you get it?
ReplyDeleteGot it on Etsy! :)
Deletehttp://www.etsy.com/listing/87398953/joy-division-unknown-pleasures-tunic
Can't wait to see the finished results! I got so tickled reading your post!
ReplyDeleteThanks Alethia! You'll have to come see it when it's done :)
DeleteLemme see those muscles!!
ReplyDeleteHis or mine hehe? we're both so buff haha!
DeleteSo exciting! You are so handy! I am quite jealous!
ReplyDeleteThanks so much for reading!! :)
DeleteSally, I don't think you understand - or could ever understand - how cool I think it is that you're doing this! Awhile back, I posted about how if Madalynne had a company car, a camper or something of the like would be it. Good luck on the renovation!
ReplyDeleteThank you so much. I can't express enough how excited I am to have it FINISHED! : ) : )
Deletesorry - here's the link: http://www.madalynne.com/company-car
ReplyDelete