Shelby Rebuild: The Roof
This is the second post of two from last weekend's rebuild. The holidays got in the way of me posting this sooner, but here ya go. Sorry for the delay. We had a super successful day working on the interior supports and the roof.

Most of the water damage on the interior of Shelby came from the leak in the sunroof. It was the only real visiable damage we saw when we purchased our 1973 Shasta Compact. With more demolition and ripping out the benches and kitchen, we saw more water damage, but this was by far the worst! We were both unsure of how to go about fixing this, but after working on the front and back walls, it was a piece of cake! First, we removed the runsoof. Most of the rotten wood had fallen down, but removing the screws from the top allowed the remaining rot to just fall to the ground.

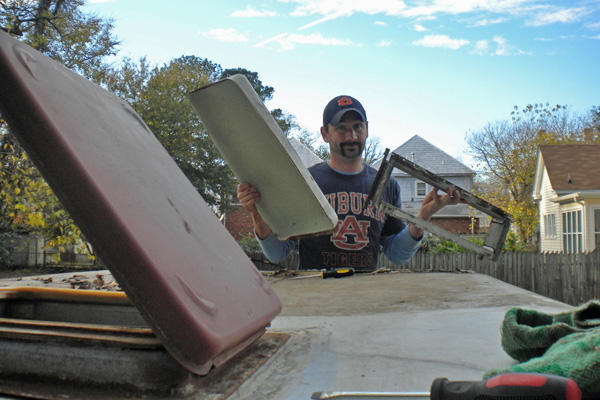
We scraped and scraped the old caulk off the roof and gave the sunroof a good scrub. We then removed the vent from the front right side of the camper. This vent was for the propane exhaust and fumes (CO2 right?) from the fridge and stove that were once inside the camper. Well we don't need a hole in the ceiling. Being the handy woman that I am, I just happened to have a scrap piece of sheet metal behind my china cabinet that was the exact size we needed (leftovers from this project). We removed the hood and cleaned that up as well.

We cut all the wood to size, for the vent and cross beams on the sunroof. Caulked the entire top of the roof around the sunroof and sat it back into place, with a screw on each side in for a placeholder, keeping the sunroof from shifting. We screwed in one support and then went to the hood.

Caulking the hood and placing it back, we then sandwiched the sheet metal between the aluminum roof and the wood supports, using liquid nail to hold it in place. Since the hood itself will keep rain away from the interior of the camper, the sheet metal served as a barrier against drafts and air flowing inside.

We predrilled the holes to reattach the hood to the supports, to go through the sheet metal. Then we screwed all the screws on the sunroof and hood back on, and that was that. After all wood supports were back up, we went back to the roof and applied caulk all over the screws. We'll go back over it with another layer to prevent future water damage. The roof is now done! It has yet to rain, this whole last week, but we're 99% sure it will hold up against all water.

Some small cosmetic work I did, removing the old running lights, that we will just replace with reflectors. We removed them with the drill, cleaned off the old caulk, and from the interior, placed a wood support along the line of the lights, and drilled wood screws through the original holes. The caulked it heavily to seal the hole. Once the reflectors are in place after the final coat of paint, they will also be caulked around the edges.

The funniest part of the day, was Zeus freaking out because he couldn't see Matt on the far side and on a ladder. He was such a whiner. After I snapped this shot, I called him to me and pointed out how he could see Matt from farther back, away from the camper. He then laid down exactly where I was standing, letting out a large sigh. Such a daddy's boy.

It was quite scary with Matt standing on top of the ladders, and I wasn't able to offer much anchoring, having to hold and brace the wood supports from the inside of the camper. Where he is standing, above, was right beside the hood of on the right side of Shelby. He was simply applying a final layer of caulk, but during the reattachment of the hood, we removed the access panel on the right, and I placed a hand on his legs to try to help, if not to mainly feel better about him not falling.

Hooray for progress! Next step, getting wood cut for the new walls! We're using planed down wood to cover the existing walls, and to build the new ones back up. Also, it's time for wiring and installing solar panels. This week will be all about researching and buying what we need, as far as electrical, and getting my friend to cut us more wood. Did you know all the wood we're using on this project is antique hardwood pine?! We're even recycling the wood. It comes from old mills, and the wood was cut down in the last 1800s.
We may wait until after my show to get more work on the camper done. I have my winter fashion show in less than two weeks. Lots of work to do before then. Until next time.. ! Happy Monday, friends.
We may wait until after my show to get more work on the camper done. I have my winter fashion show in less than two weeks. Lots of work to do before then. Until next time.. ! Happy Monday, friends.


wow! even I, who knows little about campers, can see that you made a lot of progress! Good luck with your upcoming fashion show!
ReplyDeleteIt looks good so far! Happy you made progress You guys know so much about that stuff!
ReplyDelete<3Chelsea Elizabeth
Happy you made progress, Thanks to you who has provided the intricate information in simple words
ReplyDelete